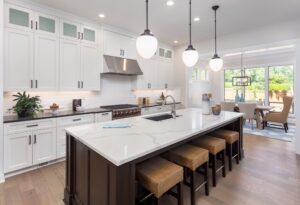
Interior Wall Painting Tips for a Stunning Home Transformation
A fresh coat of paint can dramatically enhance your home’s ambiance, reflecting your personal style and breathing new life into your living spaces. Whether you’re aiming to update a single room or undertake a comprehensive interior makeover, understanding the nuances of wall painting is essential. This guide delves into selecting the best interior paint for walls, offers professional wall painting tips, outlines how to prep walls for painting, and highlights mistakes to avoid when painting walls while answering some frequently asked questions along the way.
1. Choosing the Best Interior Paint for Walls
Selecting the appropriate paint involves more than just color preference; the type of paint and its finish play pivotal roles in the final outcome.
Types of Paint Finishes
-
- Matte (Flat) Finish: Ideal for low-traffic areas like bedrooms, offering a non-reflective appearance that conceals imperfections but is less durable and harder to clean.
- Eggshell & Satin Finish: Suitable for living rooms and hallways, these finishes provide a subtle sheen, are more washable than matte paints, and strike a balance between appearance and durability.
- Semi-Gloss & Glossy Finish: Best for high-moisture areas such as kitchens and bathrooms due to their durability and ease of cleaning. They offer a shiny appearance but can highlight wall imperfections.
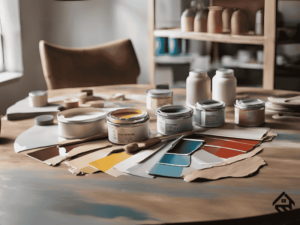
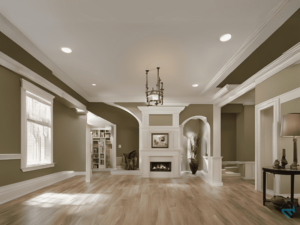
Color Selection Tips
The color palette you choose sets the mood of your space. Light colors can make a room feel more spacious and airy, while darker hues add warmth and coziness. To visualize how different shades will look in your home, consider applying sample swatches and observing them under various lighting conditions throughout the day.
What is the most durable type of interior wall paint?
For durability, semi-gloss and satin finishes are ideal. These finishes resist stains and are easy to clean, making them perfect for high-traffic areas.
For inspiration on color combinations and trends, explore Real Simple’s guide on how to paint a wall.
2. Professional Wall Painting Tips
Achieving a professional-looking finish requires more than just applying paint to walls. Attention to detail and the right techniques are crucial.
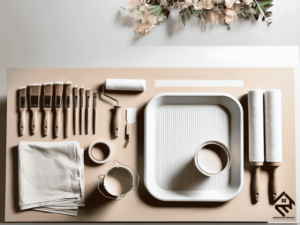
Essential Tools and Materials
-
- High-Quality Brushes and Rollers: Investing in good-quality tools ensures even application and a smoother finish.
- Painter’s Tape: Essential for protecting trim, ceilings, and adjacent walls, ensuring clean edges.
- Drop Cloths: Protect your floors and furniture from paint splatters with durable drop cloths.
- Sandpaper and Spackling Compound: Necessary for smoothing surfaces and filling in holes or cracks.
- Primer: Helps in covering stains and provides a uniform base for the paint, especially when transitioning from dark to light colors.

Application Techniques
-
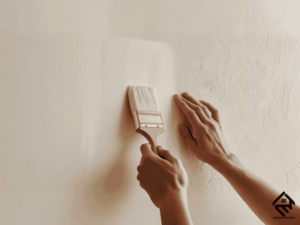
- Cutting In: Begin by painting along the edges, corners, and trim with a brush before using a roller on larger areas. This technique helps achieve clean lines and prevents overlapping marks.
- Rolling the Paint: Load the roller properly by dipping it into the paint tray and rolling it back and forth to evenly distribute the paint. Apply in sections using a “W” or “M” pattern to ensure even coverage and minimize streaks.
- Maintaining a Wet Edge: To avoid lap marks, always roll over the edges of the previous section while the paint is still wet.
Should I use a brush or roller for wall painting?
Both! Use a brush for cutting in around edges and a roller for large surfaces to achieve a smooth, even finish.
For a comprehensive list of painting tools and their uses, refer to Family Handyman’s interior painting tips.
3. How to Prep Walls for Painting
Proper preparation is the cornerstone of a successful painting project. It ensures that the paint adheres well and results in a smooth, long-lasting finish.
Steps to Prepare Your Walls
-
- Clean the Walls – Remove dust, dirt, and grease with a mild detergent solution. Clean walls ensure better paint adhesion.
- Repair Imperfections – Fill holes and cracks with spackling compound, then sand smooth once dry.
- Protect Surfaces – Use painter’s tape to cover trim, baseboards, and edges. Lay down drop cloths to shield floors and furniture.
- Prime the Walls – Applying a primer can help cover stains and provide a uniform base for the paint, especially when transitioning from dark to light colors.
Do I need to sand my walls before painting?
Yes, if the walls have rough patches or peeling paint. Sanding helps smooth imperfections and allows the new paint to adhere better.
For detailed preparation techniques, check out Real Simple’s guide on how to paint a wall.
4. Mistakes to Avoid When Painting Walls
Even with meticulous planning, certain pitfalls can compromise the quality of your paint job. Being aware of these common mistakes can help you avoid them.
-
- Skipping Primer: Foregoing primer can lead to uneven coverage and poor paint adhesion. Primer provides a solid base and can mask imperfections.
- Overloading the Brush or Roller: Applying too much paint at once can cause drips and uneven application. It’s better to apply multiple thin coats for a smooth finish.
- Neglecting to Stir Paint: Paint components can separate over time. Stirring ensures consistent color and texture throughout the application.
- Painting in Inadequate Lighting: Poor lighting can cause missed spots or uneven coverage. Ensure the room is well-lit to spot and correct imperfections promptly.
- Ignoring Drying Times: Applying subsequent coats before the previous one has fully dried can result in peeling and uneven texture. Always adhere to the manufacturer’s recommended drying times.
How long should I wait between coats of paint?
Most paints require at least 2-4 hours between coats, but always check the manufacturer’s recommendations for the best results.
For more insights on common painting mistakes, refer to The Spruce’s article on painting mistakes.
Transform Your Space with Professional Expertise
While DIY painting can be fulfilling, it often requires significant time, effort, and precision. At RenovationDay.com, we’ve transformed numerous homes with our professional painting services, ensuring impeccable results and satisfied customers. Our team brings expertise, efficiency, and a keen eye for detail to every project, turning your vision into reality.
Conclusion
Embarking on an interior wall painting project can rejuvenate your home and reflect your personal style. By selecting the right paint, employing professional techniques, and avoiding common pitfalls, you can achieve a stunning transformation. However, for those seeking flawless results without the associated challenges, professional assistance is a worthwhile consideration.
For exceptional painting services that guarantee satisfaction, trust the experts at RenovationDay.com. Contact us at 470-665-3590 to discuss your project and experience the difference of professional craftsmanship.